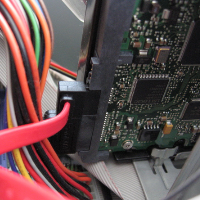
When a room gets messy, you start running out of space. Stepping over clutter and not having room to store things forces you to clean. But when your hard drive gets messy, there is usually still tons of space. With vast areas of empty storage, there is less pressure to keep your computer tidy.
Why You Should Do a Regular Digital Clean-Out
In my physical life, I’ve never been a packrat. When I don’t use stuff, I just throw it away. But when spaces became digital and infinite, I had trouble letting go. Instead I simply made a new folder and stuffed it with more things.
The reason to clean out your hard drive is simple. It makes using your computer easier. Documents are easier to find, easier to save and fewer things will go missing. Just a few weeks ago I did a clean-up and I found the time wasted searching or saving files is already paying off.
Even if you reformat your computer regularly, that doesn’t change the job of actually cleaning up your file structures. Changing rooms in a house, doesn’t clean them, so don’t think you’ve solved your organizing problem. If you want to get started with a digital clean-up here’s how:
Step One – Purge
Delete any files that aren’t critical or recent. You might be surprised to find several backups of the same files and folders throughout your hard drive. Get rid of anything you can easily download again and don’t expect to use in the near future.
Don’t try to do any moving at this stage, just delete files. At the end you should have a skeleton of your former file structure as everything not necessary gets purged.
Step Two – Design a New System
How can you tell whether an organizing system is good? The best way is simply to see how long it takes to become cluttered again. If your system is broken after a week or two, you probably committed a design flaw, so it shouldn’t be taken as a sign of your fundamental incompetence at staying tidy.
A good system should have as few layers as possible with as few files within each folder. If you have a lot of programs that link to specific locations in your file structure, you’ll have to either re-do that program’s settings or try to work around the structure you have.
Step Three – Move Files and Folders
The next step is to move all your files and folders into the new system. If you find that certain folders you expected to need are barren, consider getting rid of them. Excess structure just hastens the mess that will eventually arrive.
Step Four – Create a Backup System
Some computers have automatic backups. But it is probably wise to create your own backup system for all important files. I also use this for my online files, and you might want to create separate backups for different computers or areas of work.
The key to a good backup system is that you do it regularly and that it doesn’t become a cluttered mess. If your backups are disorganized, you won’t be able to piece them together if you lose your main files. Keep backups minimal to store everything efficiently.
Step Five – Test It
The last step is simply to test the new organizational system. If you start noticing clutter building up in the next few weeks, go back to step one or two and consider the design. It might seem efficient, but if key folders are buried too deep you might not use them. If folders contain too many items, you might not find them.
These five steps generally only take between 30-60 minutes, but I’ve found the results to be worth the tiny investment.


 I'm a Wall Street Journal bestselling author, podcast host, computer programmer and an avid reader. Since 2006, I've published weekly essays on this website to help people like you learn and think better. My work has been featured in The New York Times, BBC, TEDx, Pocket, Business Insider and more. I don't promise I have all the answers, just a place to start.